When it comes to managing MSI updates, there are several approaches you can take.
With modern infrastructure management tools (IMT) that you have available today, like MECM (SCCM) or Intune, setting up MSI upgrades is straightforward – you can configure the upgrade directly within the platform.
However, the MSI technology also allows or native self-upgrades, which can make the decision more challenging, especially for intermediate or beginner-level IT professionals.
By the end of this article, you’ll understand how exactly this upgrade mechanism works within infrastructure management tools, and why, based on my experience, it’s often better to let the MSI handle its own upgrades.
Upgrade via Infrastructure Management Tools
In terms of infrastructure management tools, we have many blog posts about how supersedence works and how you can configure applications inside SCCM or Intune, so there are many options and modern tools available today.
Back in the day when the MSI concept wasn’t grasped entirely, we had the opportunity to design application deployments inside the SCCM that relied on Supersedence. However, Supersedence as a concept had its flaws, and this was well documented in an article done by my colleague. You can read it here.
The same applies for Azure Intune, so you might face some challenges when working with Supersedence, unless you don’t really bother going through the hassle.
One other aspect we need to keep in mind is that usually large enterprise environments want the full package capable of upgrading itself. Now, you might say, “Alright, that’s easy with MSI.” And you’d be right… mostly. The MSI technology is relatively simple because there are some rules that you need to follow in order to make a package upgradeable.
But EXE installers? They play by different rules. That is why, in general, inside large infrastructure organizations, we need to use wrappers such as Powershell App Deployment Toolkit to wrap the package, and inside that wrapper, we are dealing with the upgrade of previous versions.
So, as a best practice, it’s very important that an MSI or whatever type of package you create or design to upgrade itself when a new version is available. This doesn’t apply only to IT professionals who handle enterprise environments but also to the ISvs.
Implementing Self-Upgrades in MSI Packages
When it comes to MSI upgrades, things are quite simple.
If you are using Advanced Installer, all you need to do is navigate to the Upgrades page and input the upgrade code of the previous application that you are trying to update, and that’s pretty much it.
Of course there are some additional rules that you need to follow when it comes to MSI technology, so I will link the documentation page of Advanced Installer on how you can easily add an upgrade code so that everybody will know how to use it in the future.
If you’re new to Advanced Installer, you can give it a try through our 30-day free trial.
With MSI technology you also have very large control over what happens with application versioning; for example, you can choose to automatically upgrade all the product versions or allow side-by-side installations of different product versions.
Furthermore, if you want to upgrade the previous version, you have multiple choices:
- You can uninstall the old version first and then install the new version
- You can uninstall the old version first, reboot the system, and then install the new version
- You can install the new version first and then uninstall the old version
That means you have tons of choices that you can make that are not accessible inside infrastructure management tools.
Therefore, Advanced Installer Upgrade feature enables you to configure whatever way forward you want for your MSI upgrade:
- If you want to add a new upgrade, just right-click under Upgrades and click on “New upgrade”. A new window appears where you can select, for example, an application which is already installed on the machine.
- You can choose a previous MSI that you have and Advanced Installer will take everything from there,such as the upgrade code, the minimal version, the maximal version, the language. Then the Advanced Installer will perform the necessary settings inside the MSI, for example setting the properties so your upgrade will work seamlessly.

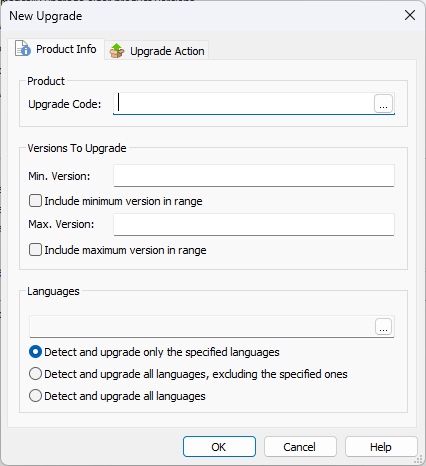
If you don’t have the previous MSI, that’s totally fine. Just click Cancel, and a new window called New Upgrade will appear.
From there, you can configure everything manually:
- Enter the Upgrade Code manually.
- Specify version limits:
- Minimum version
- Maximum version
- Choose whether to include the minimum and/or maximum version in the version range.
- Select applicable languages for the upgrade.
- Choose detection and upgrade behavior:
- Detect and upgrade only if the specified languages exist.
- Upgrade all languages except the specified ones.
- Or simply detect and upgrade all languages of your MSI.
Managing Upgrades with PacKit Powered by Advanced Installer
While PacKit isn’t a package editor or infrastructure management tool, it plays a key role in the final stage of your deployment pipeline.
Think of PacKit as the last step in your packaging and deployment process. By the time a package reaches PacKit, it should have already been prepared – ideally the MSI will have the upgrade codes implemented into it. This allows the package to handle its own upgrade during deployment.
If you prefer a more hands-on method, like wrapping your deployments through the PowerShell App Deployment Toolkit, PacKit fits right in. Whether you’re using MSI, EXE, or another installer format, you can easily attach a wrapper and prepare it for deployment.
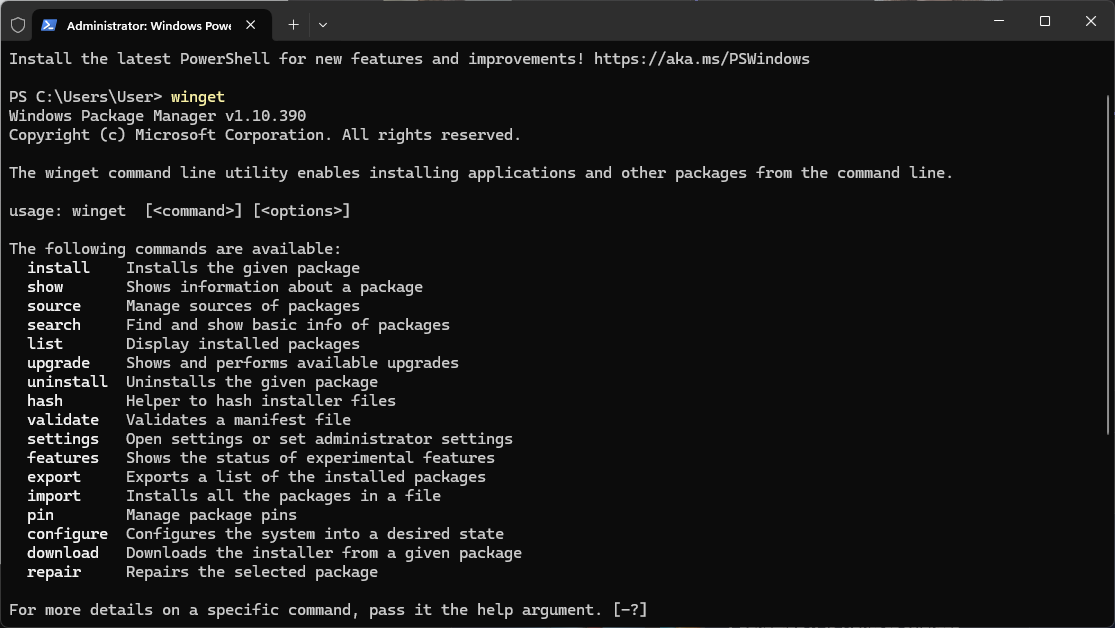
One of PacKit’s standout features is its WinGet integration. If you want to upgrade an existing package – just open PacKit and search the WinGet repositories and import the required versions. During the import phase, PacKit creates a new package with all the necessary installation and uninstallation command lines pre-configured.
Once your package is ready, you can use PacKit to upload it directly into your SCCM infrastructure or into any infrastructure – without setting foot in on-prem systems or going to Azure dashboards and doing all those steps to create your application as necessary.
It’s fast, streamlined, and efficient.
Download PacKit for free and streamline how you handle MSI upgrades across your IT infrastructure.